
How to Create an ERC-20 Token in 2026: The Complete eTokenLab & Solsmint Guide
A no-code walkthrough for launching tokens on Ethereum, BNB Smart Chain, Base, Polygon, and Solana

admin
Author
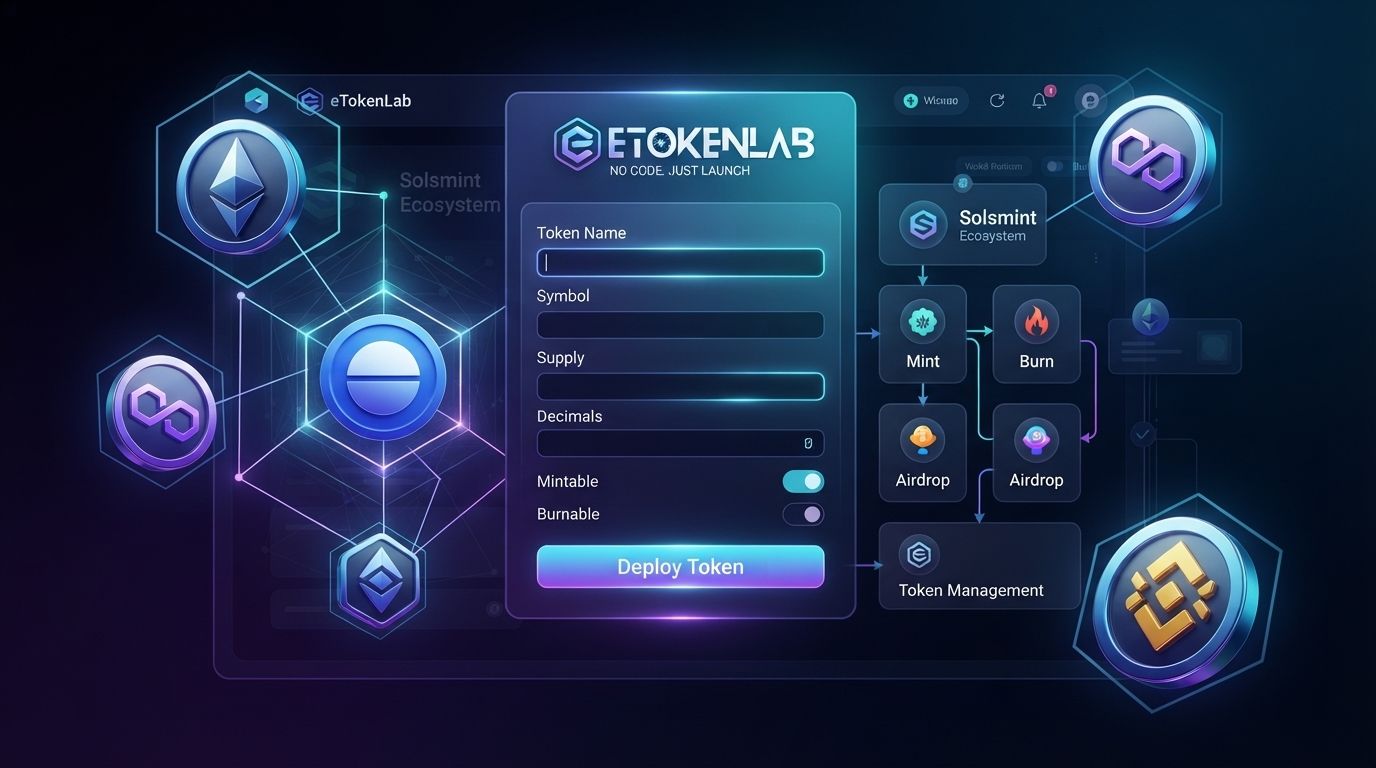
Launching a crypto token used to require a Solidity developer, a security audit budget, and weeks of testing. That barrier is gone. Today, anyone — a startup founder, a DAO organizer, a community builder, or a first-time crypto creator — can deploy a fully functional, standards-compliant token in minutes, without writing a single line of code.
This guide covers everything you need to know about creating tokens with eTokenLab, the no-code ERC-20 token creator for Ethereum and EVM-compatible chains, and Solsmint, its sister platform for Solana SPL tokens. You'll learn exactly how each platform works, which blockchain network fits your project, how to configure mintable and burnable token features, how to add your new token to MetaMask, and how to manage your token after launch — all with practical, step-by-step instructions.
Quick Answer: What's the Fastest Way to Create an ERC-20 Token?
The fastest way to create an ERC-20 token without coding is to use a no-code token generator like eTokenLab: connect a wallet, choose a network (Ethereum, BNB Smart Chain, Base, or Polygon), select a token template, enter the token name, symbol, supply, and decimals, then click Deploy. The entire process typically takes just a few minutes, and the token goes live on-chain as soon as the deployment transaction confirms. For a Solana-based token, the equivalent no-code path is Solsmint.
What Is eTokenLab?
eTokenLab is a no-code token creation and management platform built specifically for the EVM (Ethereum Virtual Machine) ecosystem. It lets you design, configure, and deploy an ERC-20 token directly from your browser, using a guided interface instead of a code editor.
eTokenLab is an official product developed and maintained by the Solsmint team. Solsmint, an established name in Solana SPL token creation, built eTokenLab to extend the same no-code philosophy — simple, transparent, affordable — into the Ethereum and multi-chain EVM space. If you ever need help with either platform, the Solsmint support team handles inquiries for both products, so you're never left without a point of contact.
In short: eTokenLab is where you go to create an ERC-20 token, and Solsmint is where you go to create a Solana SPL token. Same team, same principles, two ecosystems.
What Is Solsmint?
Solsmint is a no-code Solana SPL token creation and management platform. It allows creators to deploy Solana-based tokens at a fraction of the cost and complexity of traditional development, complete with free post-launch tools for minting, burning, and airdropping. Because Solana uses a fundamentally different token standard (SPL) than Ethereum-based chains (ERC-20), Solsmint and eTokenLab exist as two specialized platforms rather than one generalized tool — each optimized for its own blockchain architecture.
If your project lives on Solana, Solsmint.com is the platform to use. If your project lives on Ethereum or another EVM chain, eTokenLab is the right tool.
Supported Blockchain Networks
eTokenLab currently supports token deployment on four major EVM-compatible networks:
| Network | Token Standard | Best For |
|---|---|---|
| Ethereum | ERC-20 | Established projects, DeFi protocols, maximum liquidity and credibility |
| BNB Smart Chain (BSC) | BEP-20 (ERC-20 compatible) | Low-fee launches, retail-focused tokens, meme projects |
| Base | ERC-20 | Coinbase-linked ecosystem, consumer apps, fast-growing L2 communities |
| Polygon | ERC-20 | Low-cost transactions, gaming tokens, high-throughput applications |
For Solana SPL tokens, eTokenLab does not process deployment directly — instead, users are directed to Solsmint.com, the dedicated Solana token creation platform built by the same team.
Together, eTokenLab and Solsmint give creators a genuine multi-chain launch path: Ethereum, BNB Smart Chain, Base, and Polygon through eTokenLab, and Solana through Solsmint — five of the most active blockchain ecosystems in crypto, covered by one trusted team.
A Closer Look at Each EVM Network
Ethereum is the original smart contract platform and remains the benchmark for security and decentralization in the EVM world. An Ethereum token generator like eTokenLab lets you deploy directly onto Ethereum mainnet, giving your token instant compatibility with the largest set of wallets, decentralized exchanges, and DeFi protocols in the industry. The trade-off is gas cost: Ethereum transactions are typically more expensive than on other EVM chains, so this network suits projects where trust and liquidity depth outweigh transaction fees.
BNB Smart Chain (BSC) runs the same EVM architecture as Ethereum but with dramatically lower fees and faster block times. A BNB token creator workflow on eTokenLab is popular with community tokens, meme projects, and early-stage launches where minimizing deployment and transfer costs is a priority. BSC also benefits from a large retail trading audience and deep integration with PancakeSwap and other BSC-native exchanges.
Base is Coinbase's Ethereum Layer 2 network, and it has quickly become one of the fastest-growing EVM ecosystems. A Base token creator flow is a strong choice for consumer apps, social tokens, and projects that want exposure to Base's expanding user base and its ties to a mainstream, regulated exchange brand — all while keeping fees low.
Polygon is a high-throughput, low-cost EVM-compatible network built for scale. A Polygon token creator setup fits well for gaming economies, loyalty and rewards programs, and any application involving frequent, small-value transactions where Ethereum-level fees would be impractical.
A Practical Example
Imagine a small gaming studio wants to launch an in-game currency that players earn through gameplay and spend on cosmetic items. Because the currency will be minted frequently (as players earn it) and needs very low transaction costs, the studio would likely choose Polygon and the Mintable Token template on eTokenLab — allowing the team to mint new supply as rewards are distributed, without gas costs eating into the game's economy.
Compare that to a DeFi protocol issuing a governance token meant to have a fixed, transparent supply that never changes. That project would more likely choose Ethereum and the Standard Token template, prioritizing trust and immutability over low fees or mint flexibility.
Why Choose eTokenLab Over Other ERC-20 Token Creators?
There are dozens of token generator tools online, but most fall into two categories: expensive platforms with agency-level pricing, or free tools that cut corners on security and functionality. eTokenLab positions itself in the middle — professional-grade smart contracts, a clean and simple user interface, and pricing that stays well below most competitors.
A few reasons creators choose eTokenLab and Solsmint:
- Lower deployment costs than most competing token creators, without sacrificing contract quality
- No coding required — the entire process happens through a guided web interface
- No subscription fees — you pay a deployment fee once, not a recurring charge
- Free management tools included after launch (minting, burning, airdrops, and more)
- Multi-chain coverage across Ethereum, BSC, Base, Polygon, and — via Solsmint — Solana
- Direct support from the Solsmint team, who built and maintain both platforms
This combination of affordability and simplicity is why eTokenLab has become a go-to no-code token creator for founders who want to launch fast without hiring a blockchain developer.
Key Terms to Know Before You Deploy
If you're new to token creation, a few core concepts will make the rest of this guide easier to follow:
- ERC-20 — The technical standard that defines how fungible tokens behave on Ethereum and EVM-compatible chains, including how balances are tracked and how transfers are approved and executed. Learn more directly from the standard's specification on Ethereum.org.
- SPL Token — The equivalent token standard on Solana, used by Solsmint for token creation.
- Smart Contract — Self-executing code deployed on a blockchain that defines your token's rules (supply, transfers, minting, burning) without relying on a central server.
- Total Supply — The total number of token units that exist, either fixed at launch or adjustable over time if the token includes mint or burn functionality.
- Decimals — The number of subunits each token can be divided into. Ethereum's own currency, ETH, uses 18 decimals, and most ERC-20 tokens follow the same convention for compatibility.
- Gas Fee — The transaction fee paid to the network's validators or miners to process an action, such as deploying a contract or transferring tokens. Gas fees vary by network and current congestion.
- Contract Address — The unique on-chain identifier assigned to your deployed token, used to import it into wallets like MetaMask or look it up on a block explorer such as Etherscan.
Step-by-Step: How to Create an ERC-20 Token on eTokenLab
Below is the full deployment walkthrough, from opening the site to holding a live token in your wallet.
Step 1: Visit eTokenLab.com
Go to eTokenLab.com and connect your Web3 wallet (such as MetaMask). Your wallet is what will pay the network gas fee and the platform's deployment fee, and it will become the initial owner of the token contract.
Before you begin, make sure your wallet holds enough native currency for the network you plan to deploy on — ETH for Ethereum, BNB for BNB Smart Chain, ETH for Base, or MATIC/POL for Polygon.
Step 2: Fill in the Token Information
Once connected, you'll start entering the basic information that defines your token's identity. This is where you begin shaping how your token will appear across wallets, block explorers, and exchanges.
Step 3: Choose the Blockchain Network
Next, select which network you want to deploy on. Each network serves a different type of project:
- Ethereum — Choose Ethereum if credibility, security, and access to the deepest liquidity and DeFi ecosystem matter most to your project. Gas fees are higher, but Ethereum remains the most recognized and trusted base layer in crypto.
- BNB Smart Chain (BSC) — Choose BSC if you want low transaction costs and fast deployment, particularly for retail-facing tokens, community projects, or meme coins where affordability matters more than Ethereum-level prestige.
- Base — Choose Base if you're building a consumer-facing app or want to tap into the rapidly growing Coinbase-linked ecosystem. Base combines low fees with strong developer momentum and increasing mainstream visibility.
- Polygon — Choose Polygon if your project needs high transaction throughput at very low cost — ideal for gaming tokens, loyalty programs, or applications with frequent microtransactions.
If you don't yet have a strong technical reason to prefer one network, think about where your community already is. A meme-focused audience often gravitates toward BSC or Base; a DeFi-native audience often expects Ethereum; a gaming or high-volume-transaction audience often prefers Polygon.
Step 4: Choose a Token Template
eTokenLab offers several pre-built ERC-20 token templates, each suited to a different use case. Importantly, there are no additional charges for selecting advanced templates — you only pay the standard deployment fee regardless of which template you choose.
| Template | What It Includes | Best For |
|---|---|---|
| Standard Token | A fixed-supply ERC-20 token with the core functions required by the standard (transfer, approve, balance tracking) | Projects that want a simple, immutable supply with no extra mechanics |
| Mintable Token | Includes a mint function, allowing the contract owner to create additional tokens after deployment | Projects with a phased token release, ongoing rewards programs, or evolving tokenomics |
| Burnable Token | Includes a burn function, allowing token holders (or the owner) to permanently remove tokens from circulation | Projects that want deflationary mechanics or plan to reduce supply over time |
| Full Template | Combines mintable and burnable functionality, plus additional owner controls, into a single comprehensive contract | Projects that want maximum flexibility to adjust supply in both directions as the project evolves |
Choosing the right template early matters because it defines what your token contract can and cannot do after launch. A Standard Token, for example, can never mint new supply later — while a Mintable or Full Template token can.
Step 5: Fill in Token Details
With your template selected, you'll now define the specific parameters of your token:
- Token Name — The full name of your token (for example, "Solar Rewards Token")
- Symbol — The short ticker that will appear in wallets and exchanges (for example, "SOLR"), typically 3–5 characters
- Total Supply — The total number of tokens that will exist at launch
- Decimals — The number of decimal places your token supports (18 is the Ethereum standard, matching ETH itself)
Understanding Mintable and Burnable options:
- Mintable means new tokens can be created after deployment, increasing total supply. This is useful for staking rewards, ecosystem incentives, or gradual token release schedules.
- Burnable means tokens can be permanently destroyed, decreasing total supply. This is useful for deflationary models, buyback-and-burn programs, or correcting over-issuance.
If the template you selected in Step 4 already includes these features (such as the Mintable Token, Burnable Token, or Full Template), they are automatically enabled — you don't need to configure anything further. If you selected the Standard Token but want mint or burn functionality, you can enable these options manually before deployment, or simply go back and choose a template that already includes them.
Step 6: Deploy Your Token
Once every field is filled in and reviewed, click Deploy Token. Here's what happens next:
- Your wallet will prompt you to approve the transaction.
- You'll pay the deployment fee, which covers both the platform fee and the network gas cost.
- The smart contract is compiled and broadcast to the blockchain.
- After the transaction confirms, your ERC-20 token is deployed successfully — live on-chain, with its own unique contract address.
At this point, you officially have a functioning ERC-20 token. The next step is making it visible in your wallet.
How to Add Your Token to MetaMask
Right after deployment, your new token won't automatically appear in MetaMask — this is normal. MetaMask only displays a curated list of well-known tokens by default, so any newly created token needs to be added manually using its contract address. Here's the current MetaMask workflow:
- Open MetaMask and make sure you're logged into the wallet that deployed (or holds) the token.
- Switch to the correct network in MetaMask — the same blockchain where you deployed the token (Ethereum, BNB Smart Chain, Base, or Polygon). MetaMask will only show tokens that match the currently selected network.
- Open the Tokens (Assets) tab on your account's main screen.
- Scroll to the bottom and click "Import tokens" (this button may also appear as "Add Custom Token" in some MetaMask versions).
- Select the "Custom Token" tab, then paste the deployed contract address into the Token Contract Address field.
- Wait a moment — MetaMask will automatically detect and fill in the token's symbol and decimals based on the contract data. If auto-fill doesn't work, you can enter these manually (you'll find them on your deployment confirmation from eTokenLab or on a block explorer such as Etherscan or BscScan).
- Click Next, then Import to confirm.
Your token will now appear in your Tokens tab, along with your balance. Because MetaMask periodically updates its import flow, minor wording (like "Import tokens" versus "Add token") may shift slightly between versions — but the core steps of pasting the contract address on the correct network remain consistent.
Tip: Always double-check that you've copied the contract address correctly and that you're on the right network before importing — pasting the correct address on the wrong network will result in the token not showing up, or showing up with an incorrect balance.
Free Token Management Tools After Deployment
Deploying the token is only step one. eTokenLab includes a suite of free tools to help you manage your token after launch, without needing to interact directly with smart contract code or a block explorer's raw write functions:
- Mint Tokens — For tokens deployed with mint functionality, project owners can issue additional supply directly through the dashboard whenever needed, such as for staking rewards or a new funding round.
- Burn Tokens — For tokens with burn functionality, owners (or holders, depending on configuration) can permanently remove tokens from circulation, supporting deflationary tokenomics or supply corrections.
- Airdrop Tokens — Instead of sending tokens to hundreds of wallets one at a time, the airdrop tool lets you distribute tokens to a list of addresses in bulk, saving significant time and gas.
- Token Management Dashboard — A central place to view your token's supply, holder activity, and contract details at a glance.
- Additional Utilities — Ongoing tools designed to simplify common post-launch tasks that would otherwise require custom scripts or manual contract calls.
The value here is significant: most token creators charge separately for post-launch tools, or expect users to interact with raw smart contract functions through a block explorer — a process that's confusing and risky for non-developers. eTokenLab bundles these tools directly into the platform for free, so project owners can manage their token's entire lifecycle — from deployment to ongoing supply management — without ever touching code.
Why Post-Launch Tools Matter More Than Most Creators Realize
It's easy to focus entirely on the deployment moment and forget that a token's life continues long after it's minted. Nearly every active project eventually needs to adjust supply, reward early contributors, or distribute tokens to a growing community — and doing that manually through a block explorer's "write contract" interface is genuinely risky. One mistyped parameter in a raw contract call can send tokens to the wrong address or fail a transaction while still charging gas.
By handling minting, burning, and airdrops through a structured dashboard instead, eTokenLab removes that risk layer. You see clear input fields, confirmation screens, and transaction summaries before anything is signed — the same guided experience you had during deployment, just applied to ongoing management.
Solsmint: Creating Solana SPL Tokens
If your project is built on Solana rather than an EVM chain, eTokenLab isn't the right tool — you'll want Solsmint.com instead.
Solsmint is the official platform for creating Solana SPL tokens, developed by the same team behind eTokenLab. It follows the same no-code philosophy: connect your wallet, fill in your token's details, choose your configuration, and deploy — all without writing code.
Because Solana uses the SPL token standard rather than ERC-20, and because Solana's architecture (accounts, rent, program-derived addresses) differs significantly from Ethereum's, Solsmint is purpose-built for that environment rather than being a generic multi-chain tool retrofitted for Solana.
Together, eTokenLab and Solsmint give creators genuine cross-ecosystem coverage:
- eTokenLab → Ethereum, BNB Smart Chain, Base, Polygon (ERC-20 / EVM tokens)
- Solsmint → Solana (SPL tokens)
Whether your community lives in the EVM world or the Solana world — or both — the same team, the same support channel, and the same pricing philosophy apply on either platform.
eTokenLab vs. Solsmint: Which One Do You Need?
| Question | Use eTokenLab | Use Solsmint |
|---|---|---|
| Is your project on Ethereum, BSC, Base, or Polygon? | ✅ | — |
| Is your project on Solana? | — | ✅ |
| Do you need ERC-20 / BEP-20 compatibility? | ✅ | — |
| Do you need SPL token compatibility? | — | ✅ |
| Do you want free post-launch mint/burn/airdrop tools? | ✅ | ✅ |
| Do you want no-code deployment? | ✅ | ✅ |
| Do you want support from the same team either way? | ✅ | ✅ |
If you're unsure which chain is right for your project, consider your target audience and the ecosystem your community already engages with. EVM chains offer broader smart contract interoperability and deep DeFi infrastructure; Solana offers extremely low fees and high transaction speed, which has made it popular for meme tokens and consumer-facing apps.
Frequently Asked Questions
What is the difference between eTokenLab and Solsmint? eTokenLab is a no-code ERC-20 token creator for Ethereum, BNB Smart Chain, Base, and Polygon. Solsmint is a no-code Solana SPL token creator. Both platforms are built and maintained by the Solsmint team, and both offer free token management tools after deployment.
Do I need coding experience to create a token on eTokenLab? No. eTokenLab is a no-code token creator — you fill in your token's name, symbol, supply, and features through a guided interface, and the platform handles the smart contract deployment for you.
How much does it cost to deploy a token on eTokenLab? eTokenLab charges a single deployment fee that covers the platform fee and network gas cost. Advanced templates (Mintable, Burnable, Full Template) do not carry an additional charge — you pay the same deployment fee regardless of which template you select.
Can I mint more tokens after deployment? Yes, if you selected a Mintable Token or Full Template during setup, or manually enabled minting on a Standard Token before deployment. A token deployed as a fixed-supply Standard Token without mint functionality cannot mint additional supply later.
Can I burn tokens after deployment? Yes, if your token was deployed with burn functionality (Burnable Token or Full Template). The burn tool lets you permanently remove tokens from circulation directly through eTokenLab's dashboard.
How do I add my new token to MetaMask? Open MetaMask, switch to the network you deployed on, go to the Tokens tab, click "Import tokens," select "Custom Token," paste your contract address, and confirm. MetaMask will auto-fill the symbol and decimals.
Which blockchain should I choose for my token? Choose Ethereum for maximum credibility and DeFi access, BNB Smart Chain for low fees and retail reach, Base for consumer apps and Coinbase-ecosystem visibility, or Polygon for high-speed, low-cost applications. If your project is on Solana, use Solsmint instead.
Can I airdrop my token to multiple wallets at once? Yes. eTokenLab includes a free airdrop tool that lets you distribute tokens to a list of wallet addresses in a single batch process, rather than sending transactions one at a time.
Is eTokenLab cheaper than other ERC-20 token creators? eTokenLab is priced lower than most competing token creation platforms while still offering professional-grade smart contracts and a full suite of free post-launch management tools.
Where can I get support for eTokenLab or Solsmint? Both platforms are supported by the Solsmint team. If you have questions about token creation, deployment, or the management tools on either eTokenLab or Solsmint, you can reach out to Solsmint's support channels directly.
Can I create a token without any coding experience? Yes. Both eTokenLab and Solsmint are built as no-code platforms specifically so that people without a development background can launch a fully functional token. You fill in details through a guided form; the platform generates and deploys the smart contract for you.
What happens if I choose the wrong network? Your token will only exist on the network you deployed it to — for example, a token deployed on Polygon will not appear on Ethereum, even though both use the ERC-20 standard. If you need a presence on multiple networks, you would deploy separate token contracts on each one.
Is a Standard Token upgradeable to Mintable or Burnable later? No. A Standard Token's contract is deployed as-is and cannot be altered after launch. If you think you may need minting or burning functionality later, it's best to select the Mintable, Burnable, or Full Template at deployment rather than the Standard Token.
Does eTokenLab support token launches on Solana? No — eTokenLab is dedicated to EVM chains (Ethereum, BNB Smart Chain, Base, and Polygon). For Solana SPL tokens, use Solsmint, the companion platform built by the same team.
Conclusion: Launch Your Token Today
Creating a token no longer requires a development team, a security budget, or weeks of preparation. With eTokenLab, you can design, configure, and deploy a professional ERC-20 token on Ethereum, BNB Smart Chain, Base, or Polygon in minutes — complete with free mint, burn, and airdrop tools to manage it long after launch. And if your community lives on Solana, Solsmint gives you the same no-code simplicity for SPL tokens, built by the same trusted team.
Whether you're launching a DeFi project, a community token, a gaming currency, or your first crypto experiment, the path forward is the same: pick your chain, fill in your details, and deploy.
Ready to launch? Create your ERC-20 token on eTokenLab today, or create your Solana SPL token on Solsmint — no coding, no bloated fees, just a straightforward path from idea to on-chain token.
Solsmint and eTokenLab are built and maintained by the same team, offering no-code token creation and free post-launch management tools across Ethereum, BNB Smart Chain, Base, Polygon, and Solana. For support on either platform, contact the Solsmint team.
About admin
Crypto enthusiast and blockchain analyst with expertise in the Solana ecosystem. Passionate about educating others on the potential of decentralized technologies and DeFi innovations.